Re-Potting Plants

September 07, 2022

Share:

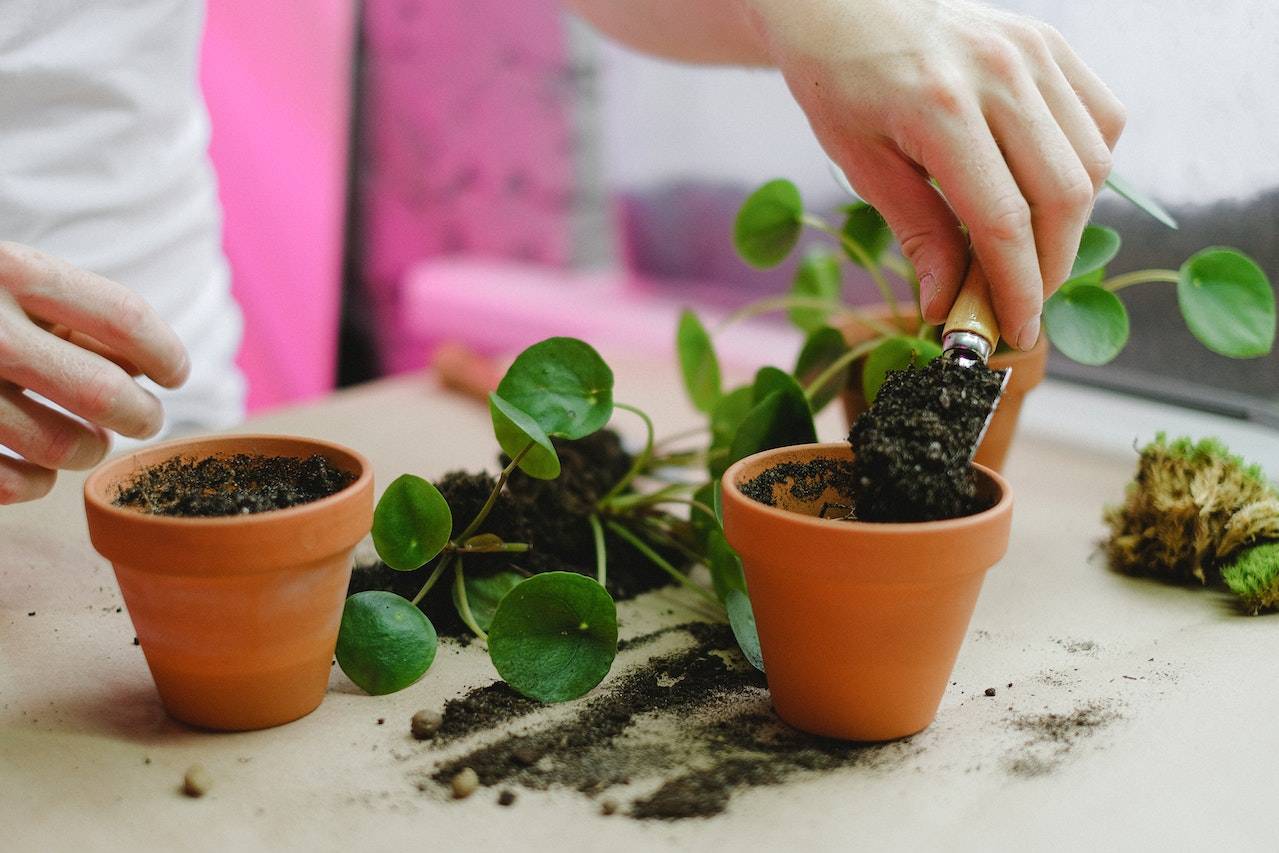
Reasons to re-pot your plant. One, your plant has outgrown its previous pot and needs more room to grow. Two, there are soil problems such as root rot or your soil is stripped of nutrients leaving it useless.

Reason One: Up Potting

So your plant is too big! It’s top heavy or root bound (the roots are entirely filling the pot- you can pull it out and see the roots in a tight ball the shape of the pot, and maybe they come out the bottom). You want to pick a pot that is large enough to give your plant space to grow, but not so large that there will be water sitting in the empty soil. The general recommendation is to go up a maximum of two inches larger than your current pot. You can find this size by measuring across the widest point of the pot, from one edge to the other. Many pots will have the size listed on the sticker if they have one.

Reason Two: Soil Problems

In this case, your soil is old or your plant has developed a disease like root rot. You should put your plant into the same size pot, or a smaller pot if the roots are severely damaged. If this is the case, remove damaged and heavily diseased parts of your plant before repotting it.

Subscribe

To join our mailing list and never miss Elm Dirt Newsletters.

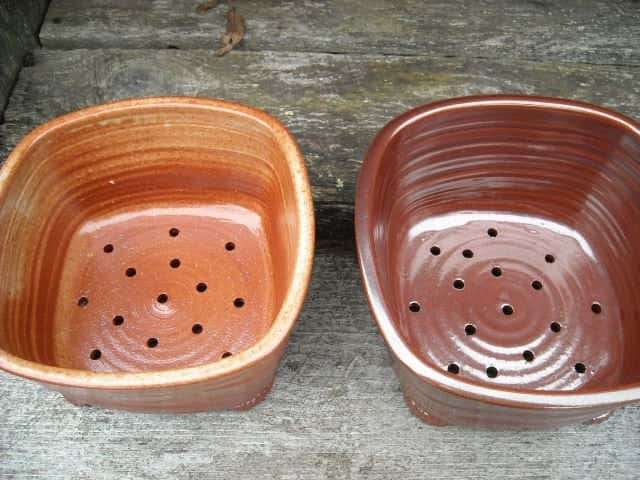
How to Choose the Right Pot

Depth

Plants that prefer good drainage often have shallow roots. These plants do best in a shallow pot, with only about 2-3 inches beyond the bottom of their roots. For most plants, you want the soil to be tightly packed around the roots with a few inches to grow, but not much more than that so the soil doesn’t retain water that the plant can’t reach.

Drainage and Breathability

If your plant likes to stay damp or dries out too quickly, use a pot that is sealed/glazed or plastic. Terracotta is very porous, so it releases a lot of moisture. If your plant prefers to stay dry or you have a habit of accidentally over watering, unsealed/bare pottery will help you lose some of the excess moisture.


All pots must have drainage! If there is no drainage, your pot will hold water and excess minerals that will make your plant sick. Make sure before you plant that there is at least one hole for drainage that isn’t so small that it could be easily blocked by a piece of bark or other material in your soil.

What if my pretty pot has no drainage? The eternal problem, but with a simple solution! You can put a plastic plant pot inside of the pretty one, as long as it has space to drain into the outer pot. Then, an hour or so after you water your plant, take it out of the larger pot and drain the larger pot. That way it doesn’t hold water that might grow fungus underneath your plant.

New!

Sale Off
Plant Perfection
$29.95

How to Choose the Right Soil

Organic Content Most plants do well with a soil that contains organic matter and high nutrient content. There are three notable exceptions to this: orchids, succulents, and carnivorous plants.


- Orchids should be in an orchid bark, which is a loose mixture of tree bark and potting soil
- Succulents prefer a soil that is more sandy, so any organic matter will have to be very fine
- Carnivorous plants should be in peat moss and nutrients should never be applied to the soil


Most other plants should be in a soil that has a mixture of organic matter (worm castings, humus), drainage materials (perlite, sand, rocks) and substrate (coco coir, peat). - 

Drainage and Retention

Plants that prefer to dry out between watering, like succulents or cacti, will prefer a soil that has high sand or rock content to allow for water to drain more easily. Plants that prefer to stay wet will prefer to have a soil with a higher substrate content with less drainage, so the water will sit in the pot longer. A mix of 1 part substrate, 1 part inorganic drainage material, ½ part organic drainage material (like bark or wood), and ½ part worm castings is a solid base soil for most potted plants.

Process of Re-potting

  • Soil Placement and How Full: You should put some soil in, so that when you set your plant in the pot the crown of the plant is at the top of the pot. If you bury the crown, your plant will rot there, which will eventually kill it. Then fill in around your plant until the pot is full. Don’t pack the soil in very tight- settling should happen and is a sign your soil will have enough air. Just pack the soil tight enough that the plant stays upright.
  • Mixing in Compost and/or Fertilizer: If you are adding additional compost to your soil, a great way to do that is to top dress with a small amount. This will also help offset the settling, and should be done about a day after you’ve repotted your plant. If you are using a synthetic slow release fertilizer, this needs to be mixed in thoroughly and before the plant is added. Otherwise you will get pockets heavy with fertilizer, and this will burn and potentially kill your plant.
  • Loosing the Roots: If your plant is rootbound, you should gently dig your fingers into the root clump to loosen it. You can break some of the outer roots, that will help promote root growth into your new soil. The most important part is the bottom, make sure your plant isn’t sitting on a flat disk of roots. They need to have some outward orientation so that the roots will extend into the new soil.
  • Water it: After you have your plant in it’s new home, water it lightly to help the soil fill in around the roots. If your plant had root rot, be sure it has dried before watering it again. If you are using a liquid fertilizer, mix it in with this first watering to promote new growth!

Related Products

Sale Off
Bloom Power Bundle
$59.90
Sale Off
Plant Juice
$19.95
Sale Off
Ancient Soil
$29.95